We have added a new Glock pin set, that you can buy HERE, to our collection. We listened to our customers who said that they wanted a longer handle for a better grip. The length of the pins is the same on both versions.
Here you go:
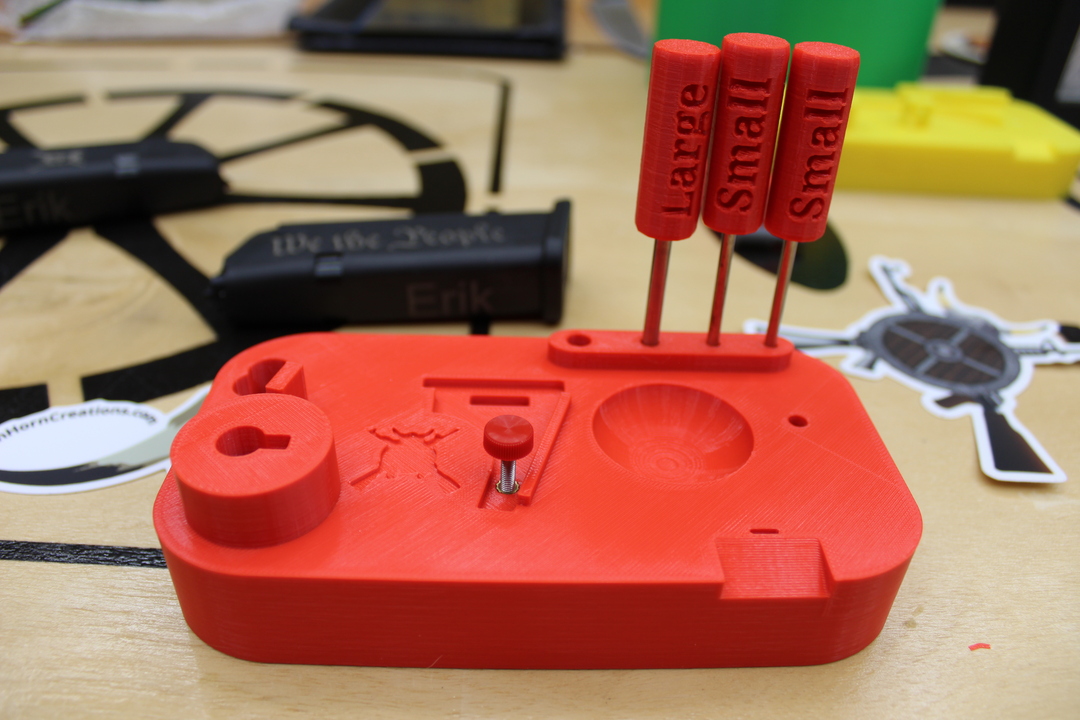
Glock Pin with longer handle and holder 2Glock Pin Long Handle in Holder
There a 3 pins in 2 different sizes, 1 large and 2 small.
Glock Pin v2 Sizes
Shown in the below image Gen 4 and prior used 3 pins:
Glock Pins Gen 4 marked pins
While the Gen 5 and later only use 2:
Glock Pins Gen 6 marked pins
We want you to be able to use our tools on all you can, so we include 3.
Here is a picture with the pins used on a Glock 17 Gen 4:
Glock Pin Set in G17 Gen 4 Top
Get your Here
Hit us up with comments or requestsAll Documents posted on this site are for informational use only. If you make ANY modifications to your Weapons based on this site, you do at your own risk! If done incorrectly, you can render you weapon unsafe and / or unusable.
Check it out! An dont laugh, it is my first time on camera 🙂 Leave a comment if you stop by!
We are Veteran family owned small business; Wife and Kids
We do 3D printing of mostly Glock / Modern Sport Rifle items
Some of the items we make are:
Glock Performance trigger tool
Glock Pins
Glock Parts Tray
GlockSmith Block
Vise and Slide Blocks
We also make AR-10, AR-15, AK47 and 74 Vise blocks with more for both coming down the line.
We are going to create a series of videos on on all the items we sell. We hope this will help you to decide to purchase our products as well as answer questions before, during and after purchase.
We stand 100% behind our products. All our Red, Base colored items are printed with PCTG filament sourced right here in the United States of America! We can not make that promise if you want a specific color or filament we cant find.
On that note, we will customize color at no additions cost as long as we have it on hand. It might take us a bit longer to get out depending on the print.
If you want custom logo and/or text get in touch with us BEFORE you order to work out any details.
We went to Shopify because hopefully they don’t drop our products for policy violations. Etsy would just randomly drop items and eBay does not seem to like rifle stuff.
I want to provide an update to the GlockSmith block . With this latest version I changed the way the Glock trigger housing is held down. I removed the printed square “bridge” and replaced it with a brass fitting and a thumb screw. This will allow better installation and usage of the trigger tool portion of the block. Will work with all Glock triggers.
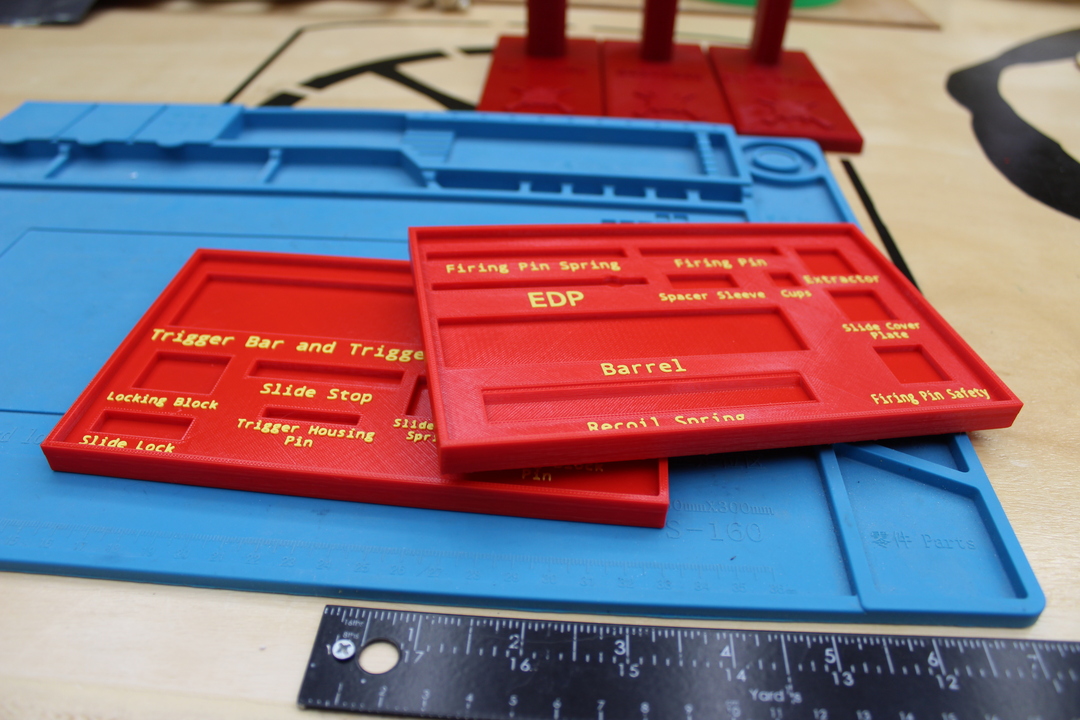
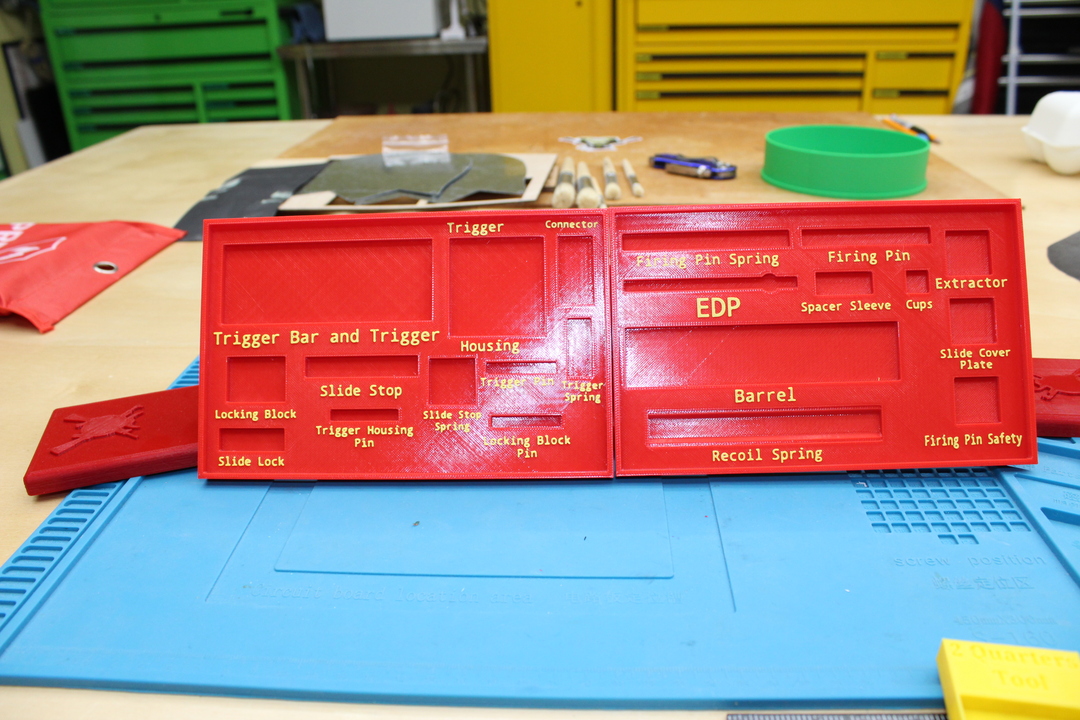
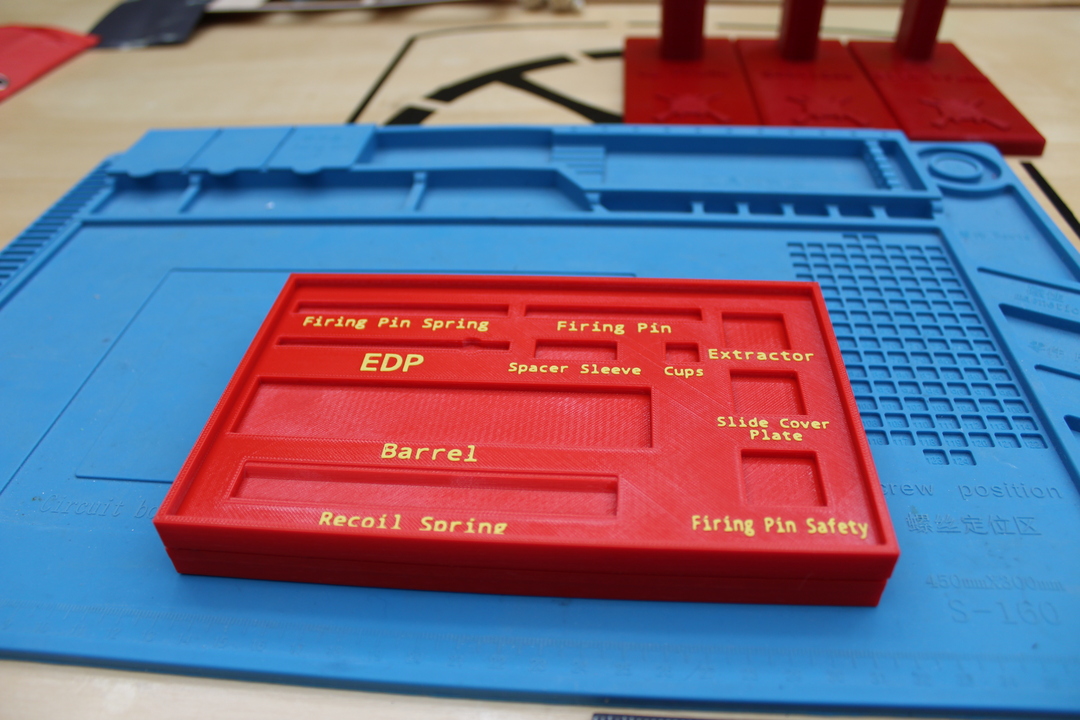
Here is a handy place to inventory and store your Glock parts
These trays are a great place to store and inventory your Glock parts. There are 2 high quality trays, 1 for you Slide (Upper) parts and one for the frame (Lower). Our Glock parts trays work for all Glocks. They stack when empty for convenient storage.
The GLOCK Performance Trigger meets the criteria for those looking for an enhanced trigger pull and ergonomics, all while utilizing a flat-faced trigger and maintaining the same safety features of the GLOCK Safe Action System.
The GLOCK Performance Trigger is now compatible with 9mm Gen4 pistols. A Gen5 slide cover plate now ships with all GLOCK Performance Triggers, as an included replacement for Gen4 models that ensures compatibility and proper function. The GLOCK Performance Trigger will not come installed on any factory models. It is available as an accessory only and must be installed by a certified GLOCK Armorer. GLOCK does not recommend any aftermarket modifications to the GLOCK Performance Trigger.
Trigger Pull Weight: ∼ 5lbs.
Fits: Gen4 and Gen5 models G26, G19, G17, G34 and models G19X, G45, G47
Glock Performance Trigger factor packaging
Here is a picture of the housing and connector as it is out of the box.
Glock Performance Trigger factory housing
After a little work this is the polish I got on the trigger bar.
Glock Performance Trigger Bar Side 1
Other side.
Glock Performance Trigger Bar Side 2
Pay special attention to the surface that rubs the connector.
Glock Performance Trigger Bar connector surface
Also extra attention should be applied to the surface touching the safety plunger. Remember, you a polishing, careful not to remove too much material.
Glock Performance Trigger Bar Safety Bump
The factory Trigger shoe comes apart the same as all Glock trigger shoes.
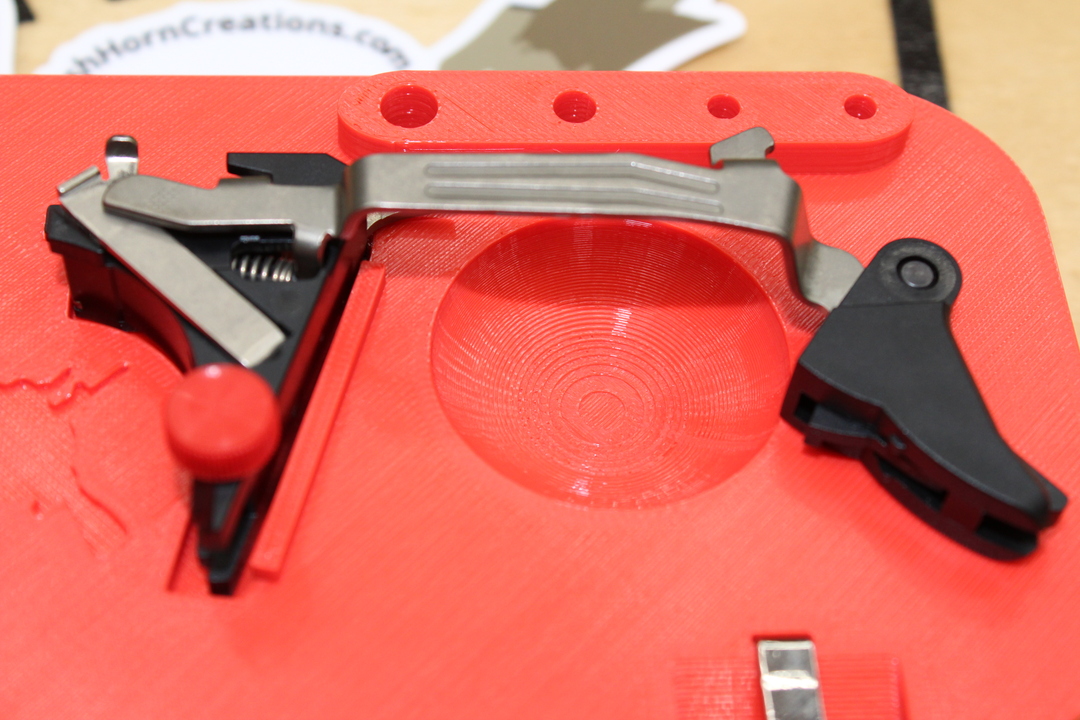
I want to provide an update to the GlockSmith block . With this version it has a trigger jig and small parts storage. You can remove and install the trigger pin, remove and install the firing pin cups, adjust your connector.
GlockSmith Block v2 everything on it
Also included are top and side working pin storage
GlockSmith Block v2 with top pin storage
I added pin storage on the side. I put them there when I am done.
GlockSmith Block v2 with side pin storage
Modified all the pin holes so the factory pins can be used and wont fall all the way through.
GlockSmith Block v2 trigger with factory Glock pin
GlockSmith Block v2 trigger removal with factory Glock pin
You can use the Glock pins I sell
GlockSmith Block v2 trigger removal with our Glock pin
or the factory pins:
GlockSmith Block v2 trigger removal with factory Glock pin
This works for all the pin holes.
GlockSmith Block v2 pins demo
You can pick one up On Ebay or Etsy item only has the pin included
These are great if you need to test and disassemble your Glock frame multiple time in one sitting. Such as adjusting your trigger shoe, trigger housing, or adjusting your connector.
They can be used to dry fire your Glock, to check to see if more changes are required. If there are, you can use the handle to easily remove the pins and make your adjustments.
DO NOT use for live fire!
When you are done, you can push them out with the factory pins or pull them out and install your factory pins and head to the range.
This is what I do for deep cleaning my pistols. I don’t want to get into the endless debate over how and when you should clean, that’s up to you. I am only showing what I do.
This is a shot of my setup before initial take down.
Gun cleaning before take down
I use my Harbor Freight ultra sonic cleaner with a 30:1 ratio of distilled water:Simple Green set on heat for 16 minutes. 8 minutes flip / adjust parts another 8 minutes. Small parts go into a jar or solution filled zip lock bag.
Gun Cleaning Simple Green HF Ultra Sonic
Then I blow everything off:
Gun Cleaning Blowing Parts Off
Then I drop the parts in my Bald Eagle ultra sonic cleaner with a 20:1 ratio of Distilled water:Ballistol set on 122 degrees for 20 minutes. 10 minutes flip / adjust parts another 10 minutes. I put the small parts in a jar with the same solution.
Gun Cleaning Bald Eagle in Ballistol
I blow and wipe everything off then lay the parts out back on the work bench.
Gun Cleaning Parts Trays
Then I put it back together and function test. Ready for the range.
Wish you had a 3rd hand to hold your Glock slide while you are working on it? Trying to adjust your sights or add an optic? This tool is for you. There are 3 models one for each slide type/size.
The images here might show different slide sizes, the tool functions the same for all of them.
After you separate your slide from the frame, you slide the block in from the back of the slide. It will be a snug fit, you might have to pinch the sides to get it to slide in.
Glock Slide Block in the vise
You do not need to remove any parts from your slide to get it to work. In most cases you are going to want to keep the block to the back of the slide, where most of your work is going to be done.
Glock Slide Block showing the adjustment screw
The Glock slide tool is made from non-marring plastic that is softer than the slide. Over time is will wear and become loose, to correct that, I added a tightening screw. As you thread it in it will spread holding the slide tighter.
Glock Slide Block showing end
With the barrel and recoil spring removed the Glock slide block can be used at any position on the slide.
I want to give my Glock 44 as many rounds as my Glock 19. To do so I made some changes to the alex alex Glock 44 15 round magazine upgrade found in several places on the internet. I started with foxalexextension found on HERE on thingiverse. I added a slot for the magazine spring and side catches to help it hold better. My remix can be found HERE
Magazine 5 round extension
I used THIS follower. Make sure it is clean with no sharp edges and overhangs.
Glock 44 15 round magazine follower
I attached it to a Walther PPQ 22 15+1 Replacement Magazine Spring. I did not want stretch my factory spring as suggested in some of the online articles. I like to keep all my factory parts as original as I can.
Glock 44 15 round magazine spring
Glock 44 15 round magazine follower and spring
Then I slid the spring assembly into the magazine and made sure it slid without getting caught and hanging up on anything.
Glock 44 15 round magazine spring install
Slid the base back on:
Glock 44 15 round magazine base plate
For the final product:
G44 15 round mag complete
I put around 100 rounds through it so far without issues. I will try and keep this post updated.