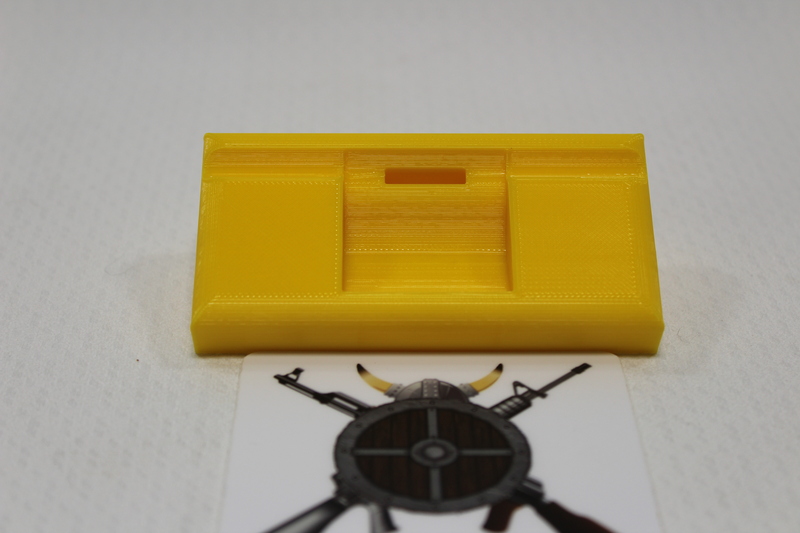
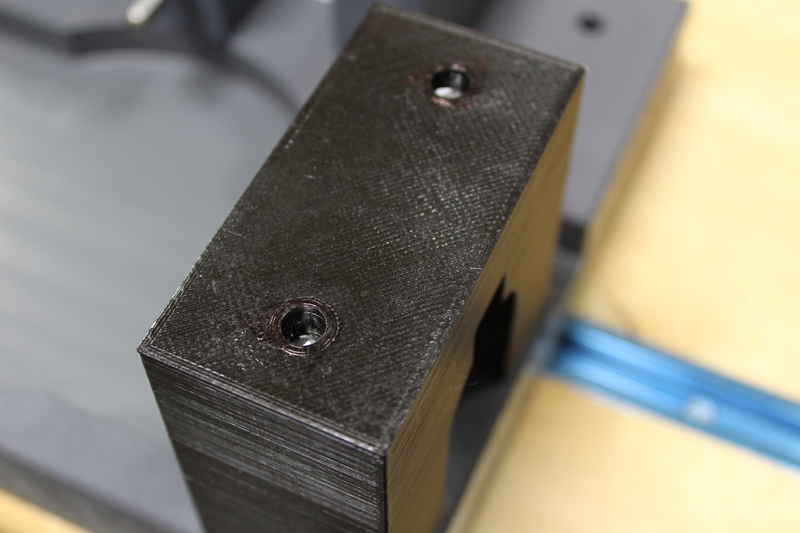
BCG to Buffer Space Gauge aka 2 Quarter Tool

I think School of the American Rifle started the 2 quarter spacing from the AR15 gas key and the receiver extension. I can not find an exact minimum spacing in the Army TM 9-1005-249-23&P Nov 2008. It makes too much sense for it not to be in there. If someone knows let me know and I will put it in the references.

I never have quarters in my pocket when I am working and if I do I will only have 2, what if I need it to fix a spacing issue? So I came up with this little gem.

It measures 2 quarters / 3.5mm thick and has a few stops to help hold it in place while you are cramming your BCG back trying to get the gauge.

BCG to Buffer Space Gauge aka 2 Quarter Tool
BCG to Buffer Space Gauge aka 2 Quarter Tool with quarters

Stops to help hold it:

BCG to Buffer Space Gauge aka 2 Quarter Tool
BCG to Buffer Space Gauge aka 2 Quarter Tool with support stops

Opening to let the BCG slide in:

BCG to Buffer Space Gauge aka 2 Quarter Tool
BCG to Buffer Space Gauge aka 2 Quarter Tool with opening

Showing the gap:

BCG to Buffer Space Gauge aka 2 Quarter Tool in use

Ref:

https://www.usmint.gov/learn/coin-and-medal-programs/coin-specifications

Posted on Thiniverse

Hit us up with comments or questions

All Documents posted on this site are for informational use only. If you make ANY modifications to your Weapons based on this site, you do at your own risk! If done incorrectly, you can render you weapon unsafe and / or unusable.

More HERE: https://viking-armory.com/?page_id=723

AR15 Buffer Spring Measurement Jig

REF: Army TM 9-1005-319-23&P Nov 2008, Page 0021-10:

Check free length of action spring. RIFLE ONLY: The free length must be between 11 3/4 in. (29.85cm) minimum and 13 1/2 in. (34.29 cm) maximum. CARBINE ONLY: The free length must be between 10 1/16 in. (25.56 cm) minimum and 11 1/4 in. (28.58 cm) maximum. If measurements are notaccurate, replace. Do not attempt to adjust the length by stretching the action spring.

Your manufacture might be different, in making the jig I used the above.

If you have a 3D printer it is a cheap print. This is too long for a standard print bed, I used my Ender Extended 400×400 print surface for this one.

You can download the STL on Thiniverse

To help check the length of your buffer spring I created 2 versions of the AR15 Buffer Spring Measurement Jig; Rifle and Carbine length. The Center is minimum length and the other is maximum length. Your printer might be different so double check measurements after printing.

AR15 Buffer Spring Measurement Jig 01
AR15 Buffer Spring Measurement Jig 02

With Rifle Spring:

AR15 Buffer Spring Measurement Jig 03

Hit us up with comments or questions

All Documents posted on this site are for informational use only. If you make ANY modifications to your Weapons based on this site, you do at your own risk! If done incorrectly, you can render you weapon unsafe and / or unusable.

More HERE: https://viking-armory.com/?page_id=723

AR15 Gas Block Tool

A tool to help hold your gas block while you are trying to drive the gas tube pin in or out. It is plastic, if you beat on too hard or too many times it will break. Not to fear! it is a cheap and relatively fast print.

AR15 Gas Block Tool 02
AR15 Gas Block Tool main jig

As an extra bonus, I created a extension tube holder!

AR15 Gas Block Tool 03
AR15 Gas Block Tool group shot

Group shot:

AR15 Gas Block Tool 01
AR15 Gas Block Tool working

Print your own! Files are on Thingiverse

Hit us up with comments or questions

All Documents posted on this site are for informational use only. If you make ANY modifications to your Weapons based on this site, you do at your own risk! If done incorrectly, you can render you weapon unsafe and / or unusable.

More HERE: https://viking-armory.com/?page_id=723

Glock Trigger Jig

A quick jig to hold your Glock Trigger for maintenance and / or training. Kinda cool to pull the trigger and see how things work.

Also good if you are doing something like the 25¢ trigger job. See how everything is running before you drop it back in.

A quick jig to hold your Glock Trigger 02
A quick jig to hold your Glock Trigger without trigger

I include the white trigger pin file ‘Glock Trigger Jig Pin.stl’. I just use one of the extra pins that come with the back straps for the trigger housing pin. I print it with supports, round part on the bed.

A quick jig to hold your Glock Trigger 01
A quick jig to hold your Glock Trigger with trigger

Hit us up with comments or questions

Or you can print it your self. Files located HERE

All Documents posted on this site are for informational use only. If you make ANY modifications to your Weapons based on this site, you do at your own risk! If done incorrectly, you can render you weapon unsafe and / or unusable.

More HERE: https://viking-armory.com/?page_id=723

The Glock Ring

The Glock Ring

This is NOT to check the diameter of your barrel or anything else! Just to check if there is a bulge in your barrel.

Glocks method of checking the barrel is to remove the slide and push it the barrel hole and make sure it does not have a bulge. I wanted something I could use on barrels that are not installed without having to remove a slide.

This example is for 9mm Barrels. I measured several 9mm barrels and slides for Glocks and came up with 0.580 inch for the inner diameter. Because printers vary check before you use.

Barrel bulge checker 9mm 01

Just slide it over your barrel and check for a bulge. PLA is softer than the barrel so there should be no marring.

Barrel bulge checker 9mm 02

Hit us up with comments or questions

All Documents posted on this site are for informational use only. If you make ANY modifications to your Weapons based on this site, you do at your own risk! If done incorrectly, you can render you weapon unsafe and / or unusable.

More HERE: https://viking-armory.com/?page_id=723

Present Arms Custom Receiver Alignment Block

My Present Arms Gunners Mount Kit is awesome. The one thing I wanted different was the Receiver Alignment Block. It does not seem to fit right on non-mil spec buffer tubes I work on. How can they know all the sizes?

You can see the gap here, it will not seat all the way.

Present Arms Receiver Alignment Block Original Bottom
You can see the gap here, it will not seat all the way.

And that is because the buffer tube rail is too wide.

Present Arms Receiver Alignment Block Original Top
And that is because the buffer tube rail is too wide.

So I do what I do and made one. Seats all the way down

So I do what I do and made one. Seats all the way down

And tightly fits the buffer tube rail

And tightly fits the buffer tube rail

The metal rod it ¼ inch and I cut it down to just below the top.

The metal rod it ¼ inch and I cut it down to just below the top.

Then topped it off with a couple of the included caps.

Then topped it off with a couple of the included caps.

Hit us up with comments or questions

All Documents posted on this site are for informational use only. If you make ANY modifications to your Weapons based on this site, you do at your own risk! If done incorrectly, you can render you weapon unsafe and / or unusable.

More HERE: https://viking-armory.com/?page_id=723

Present Arms Sleeve

A sleeve to help hold your castle nut wrench firmly in place while cranking it down on your Present Arms Gunners Mount.

I can not claim this idea as my own, I was watching this video from School of the American Rifle and though “What a great idea”. I did not have any 1 ¼ inch PVC laying around, but I do have a 3D printer and PLA. This is what I came up with for the below wrenches.

Forward Controls:

Present Arms Buffer Tube Sleeve 05
A sleeve to help hold your castle nut wrench firmly in place Forward Controls
Present Arms Buffer Tube Sleeve 02
A sleeve to help hold your castle nut wrench firmly in place Forward Controls

Magpul:

Present Arms Buffer Tube Sleeve 03
A sleeve to help hold your castle nut wrench firmly in place Magpul
Present Arms Buffer Tube Sleeve 06
A sleeve to help hold your castle nut wrench firmly in place Magpul

Wheeler

Present Arms Buffer Tube Sleeve 04
A sleeve to help hold your castle nut wrench firmly in place Wheeler

Family Shot:

Present Arms Buffer Tube Sleeve 07
A sleeve to help hold your castle nut wrench firmly in place all 3

Present Arms on all sizes:

Present Arms Buffer Tube Sleeve 08
A sleeve to help hold your castle nut wrench firmly in place Present Arms

Hit us up with comments or questions

All Documents posted on this site are for informational use only. If you make ANY modifications to your Weapons based on this site, you do at your own risk! If done incorrectly, you can render you weapon unsafe and / or unusable.

More HERE: https://viking-armory.com/?page_id=723

AR Magazine Release Tool

I wanted a tool to help get the magazine catch pushed out of my M16/AR-15 without scratching or marring the metal. To compresses the spring and make removal of the magazine catch easier.

Looking around I saw AR Magazine Catch tools similar to mine on various web sites for around $10 without shipping. I am frugal and own a 3D printer, I decided to make one.

I know you can use many other things to push it out, such as, but not limited to, pencil, punch, your kids finger….If you have a 3D printer it is a quick and cheap print.

You can download the STL on Thiniverse

Here are a few pictures:

AR15 Magazine Release tool 03
AR15 Magazine Release tool 04
AR15 Magazine Release tool 02
AR15 Magazine Release tool 01

Hit us up with comments or questions

All Documents posted on this site are for informational use only. If you make ANY modifications to your Weapons based on this site, you do at your own risk! If done incorrectly, you can render you weapon unsafe and / or unusable.

More HERE: https://viking-armory.com/?page_id=723

Glock Training Setup II – Adding a Little Flare

I got the Dry Fire Magazine Glock 19 Gen 5 half moon issue described HERE fixed. I designed and printed a magwell insert to plug the half moon and give me a little flare:

Dry Fire Magazine G19 Gen 5 Magwell
Dry Fire Magazine G19 Gen 5 Magwell Flare Insert

Just slide it in:

Dry Fire Magazine G19 Gen 5 Magwell
Dry Fire Magazine G19 Gen 5 Magwell Just stick it in!

And your DryFireMag (DFM) will slide right in:

Dry Fire Magazine G19 Gen 5 Magwell
Dry Fire Magazine G19 Gen 5 Magwell complete

Safety Check…

Install the mag-well and slide the Dry Fire Magazine in:

Need to hold on a bit when removing the DFM

Hit us up with comments or questions

All Documents posted on this site are for informational use only. If you make ANY modifications to your Weapons based on this site, you do at your own risk! If done incorrectly, you can render you weapon unsafe and / or unusable.

More HERE: https://viking-armory.com/?page_id=723

Reddit
error: Content is protected !!